
Hello friends! I hope you are having a wonderful holiday! I am aware that the photos are not showing across the blog and I'm so sorry for the inconvenience. My photo hosting service has been down for several days and unfortunately I'm not sure when the images may come back--there appears to be some progress so hopefully they'll reappear soon! Thanks so much for your patience!
xo
Kim
Quilted Tassel Pouch Tutorial
9.17.2019
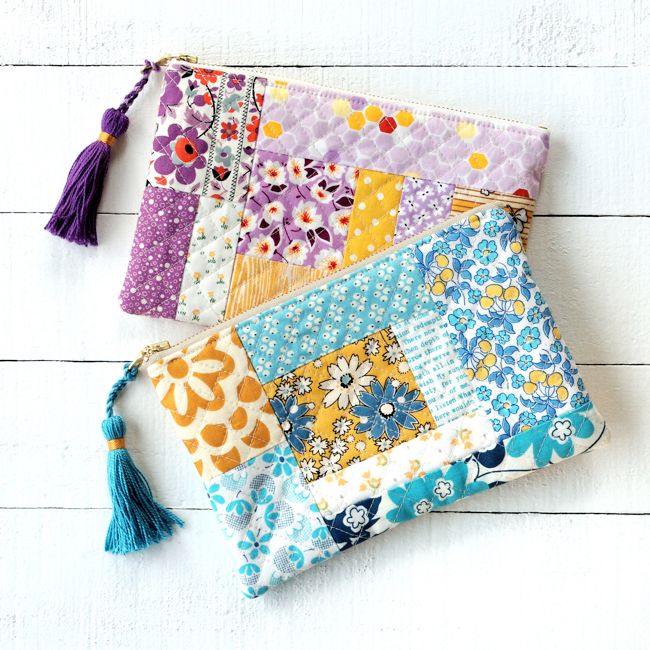
Any day that I get to make a zipper pouch is a great day, so I'm very excited to share this fun project using some very handy tools! This post is sponsored by Clover, who provided the tools featured in this tutorial, and also contains affiliate links.
Pins and Needles Book Sew Along: Weeks 1 and 2
7.23.2019
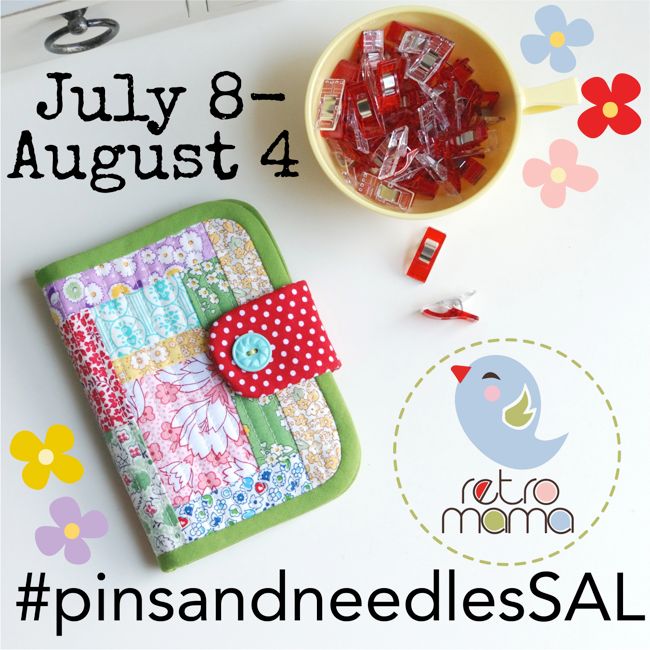
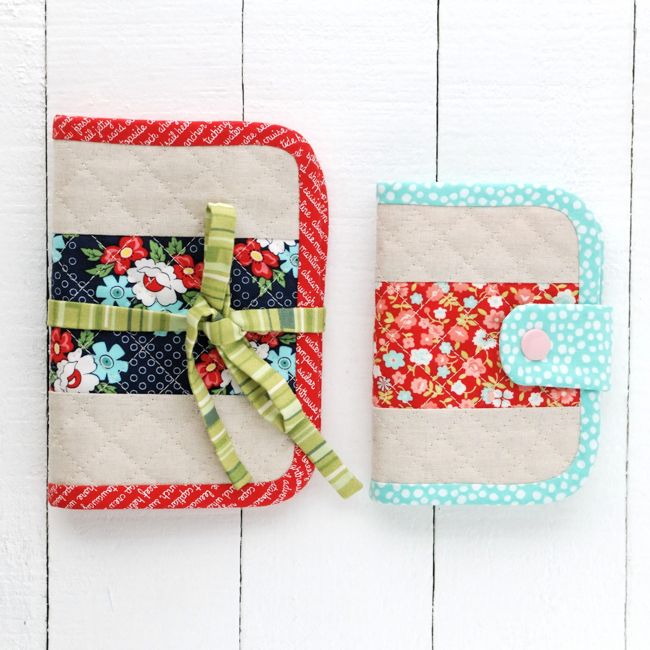
We are stitching up my new Pins and Needles Book pattern together this month, and it's been so fun seeing all the different styles and details that everyone is using! If you want to join in, all you need is to share photos of your completed needle books on Instagram with the hashtag #pinsandneedlesSAL and you'll be entered to win, now through August 4.
Read on to see what I’ve been sewing and to see our SAL winners for weeks 1 and 2!
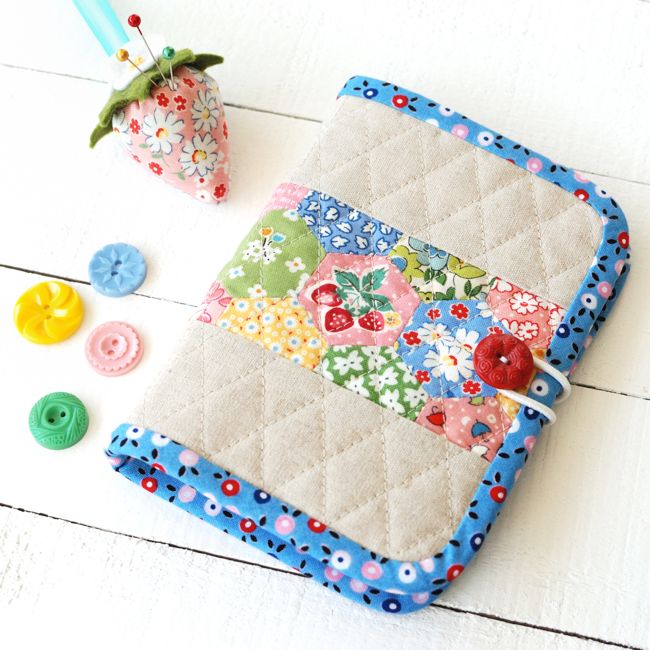
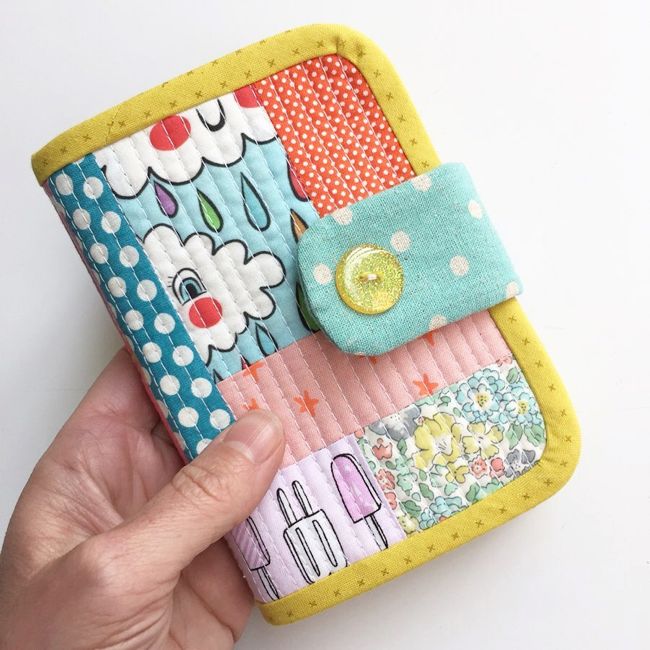
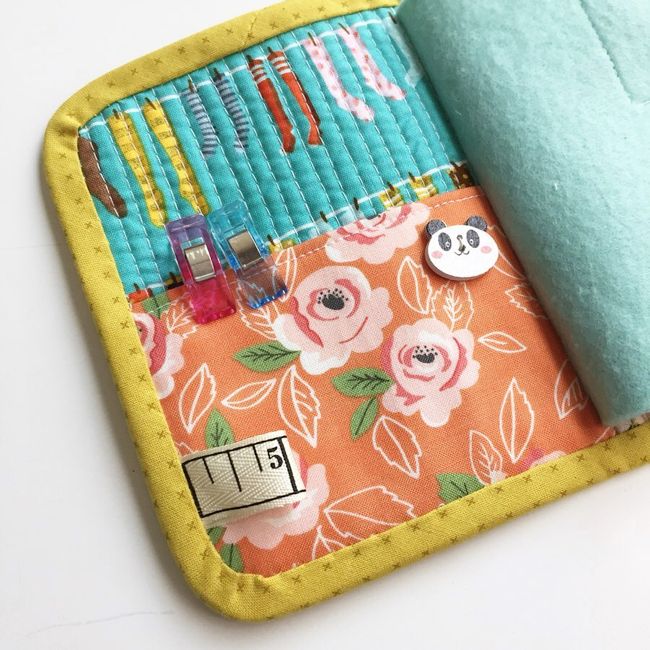
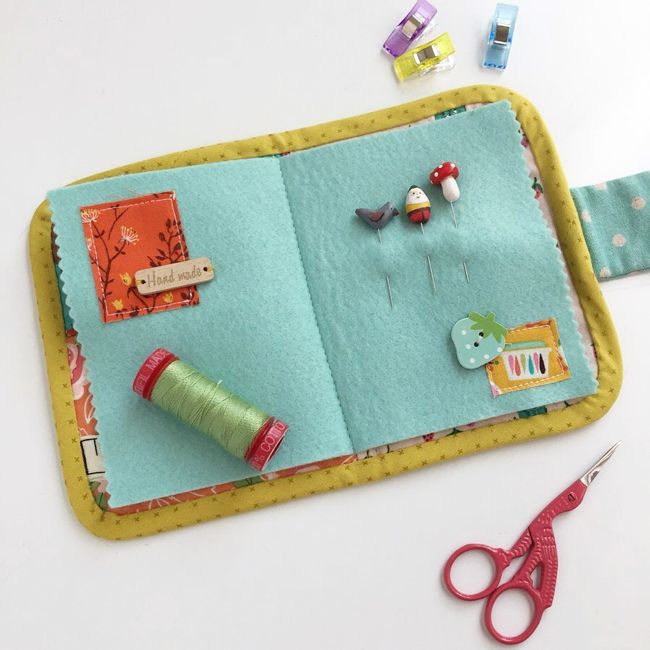
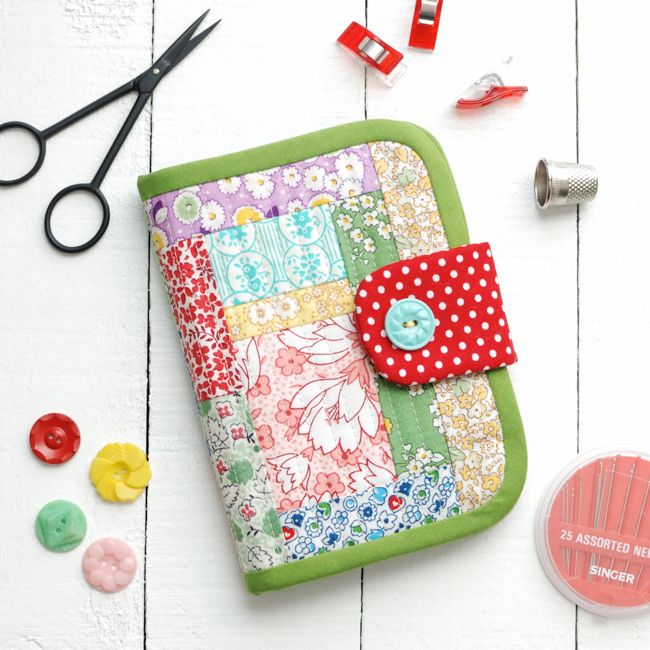
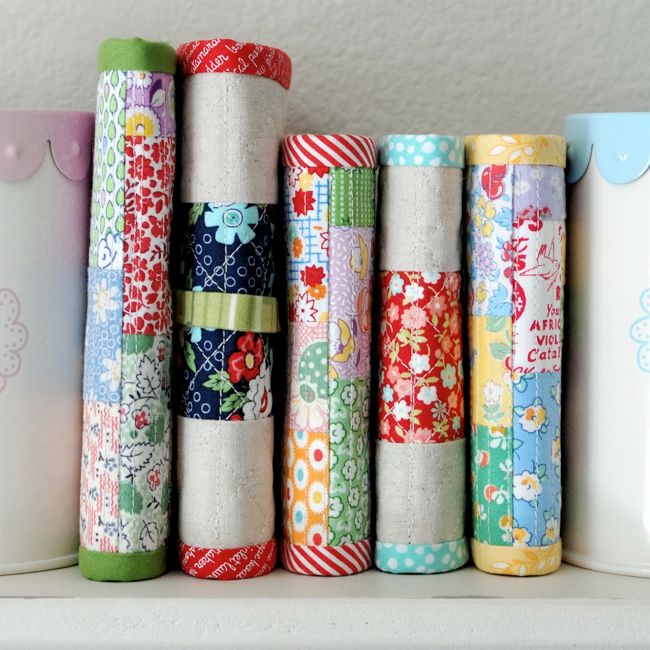
I used 3/4" sided hexagons for this EPP needle book, and with 22 hexagons, it was just right for a weekend project!
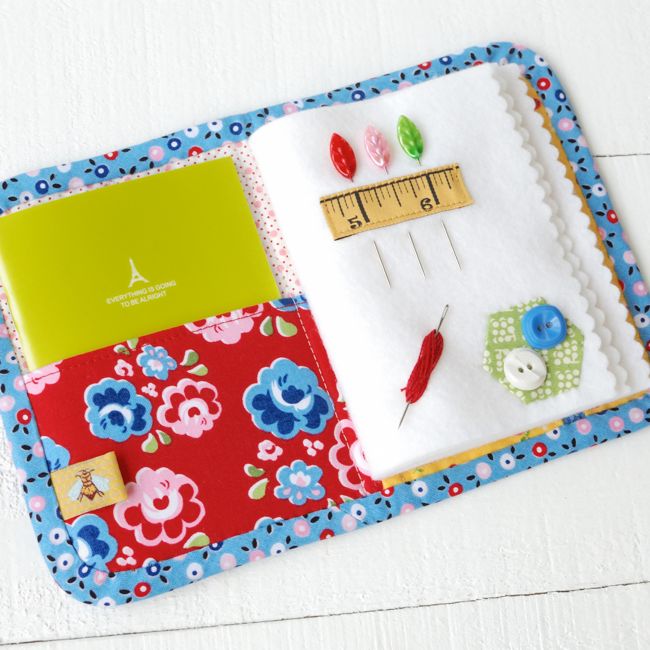
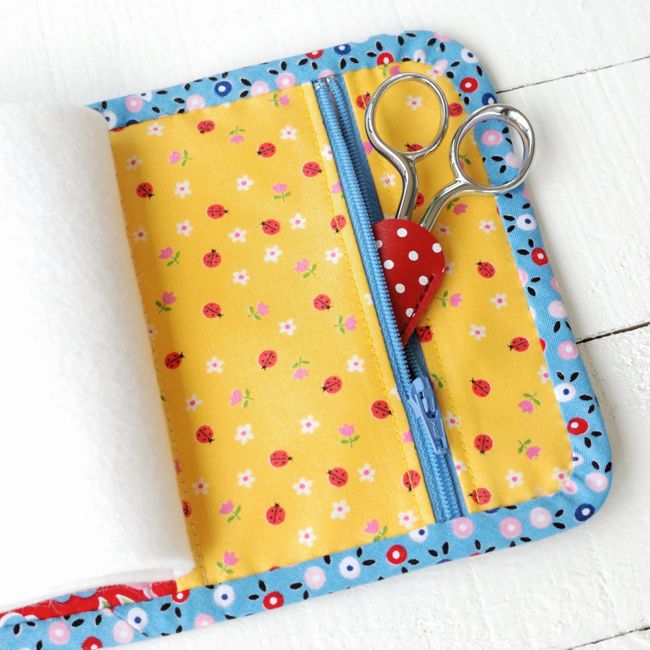
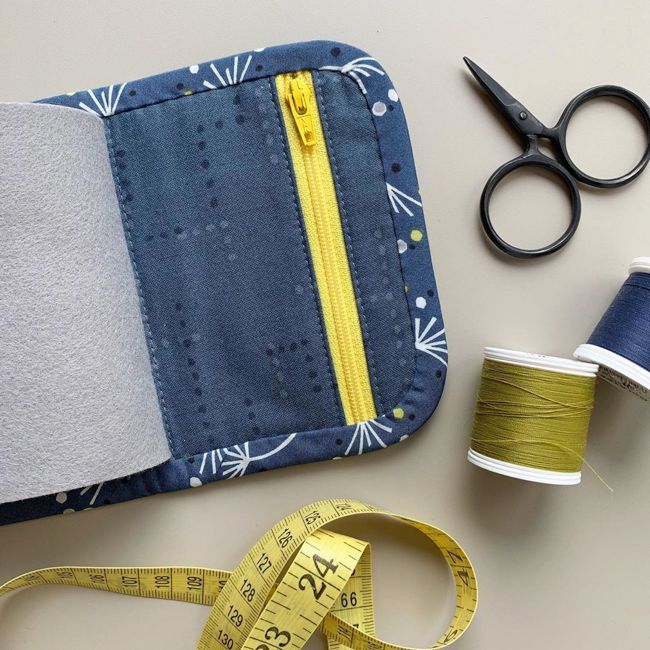
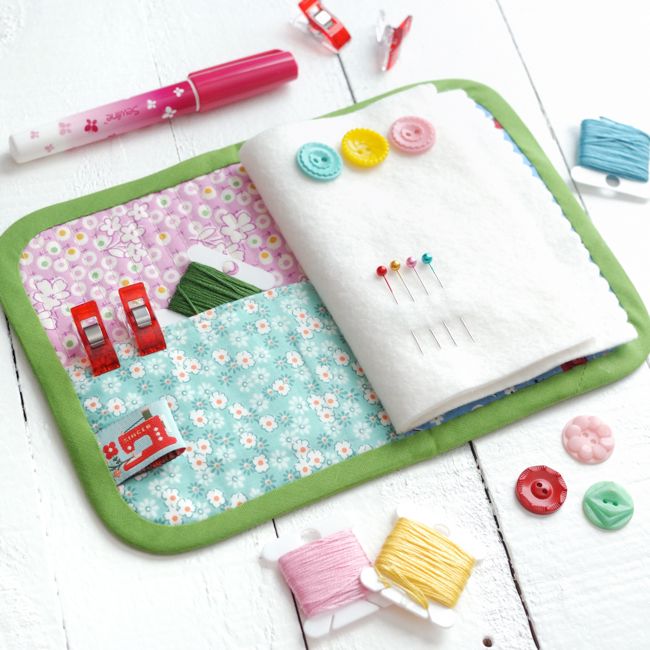
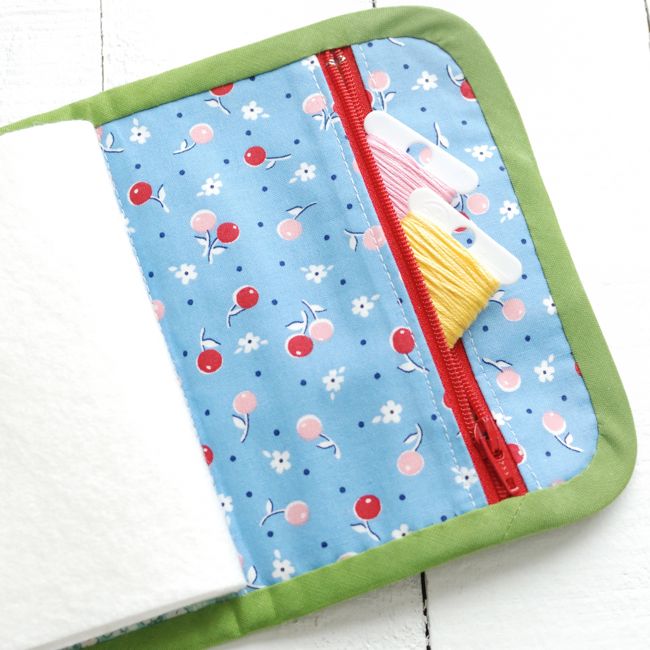
The front slip pocket fits a little notebook so I can keep notes when designing patterns. I'm constantly losing little slips of paper with my scrawled out measurements, so this should *fingers crossed* help keep me organized! I added a hexagon and ribbon to one of the felt pages and I love those sweet ladybugs on the zipper pocket!
I also posted this video, which shows how to measure and join bias binding to perfectly fit your needle book (or any small project!):

And now for the winners of Weeks 1 and 2...
Elnora @elnorac and Lori @lorimillerdesigns chose the winners and also provided fabulous prizes for Week 1!
Week 1 Winners (photo credits to Lindsay and Stef)
Stef @stef_andthefabricpieces
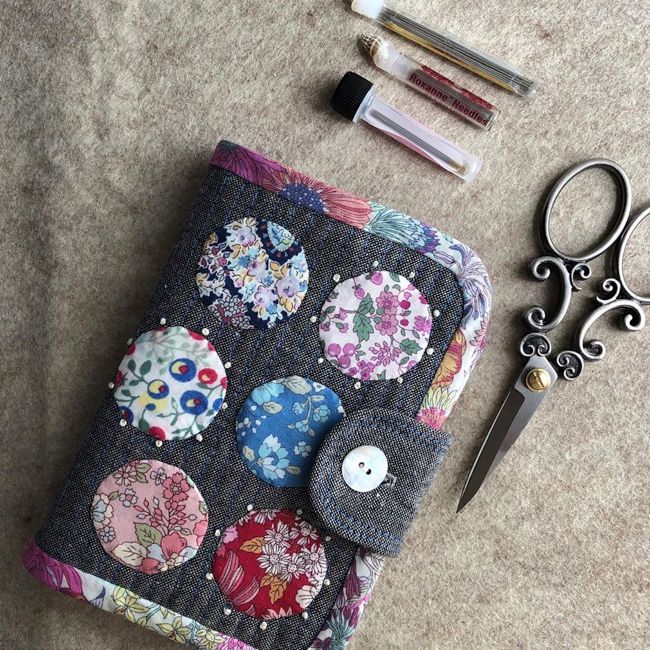
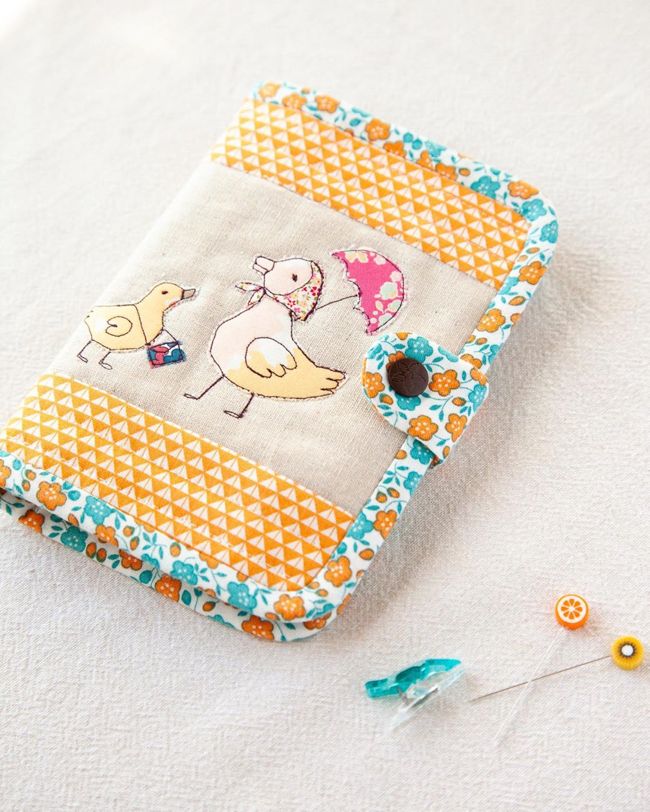
This amazing Liberty needle book is delightful—from the circle appliques to the French knots, I love every little thing about it. Stef's work is impeccable!
Lindsay @linzentart
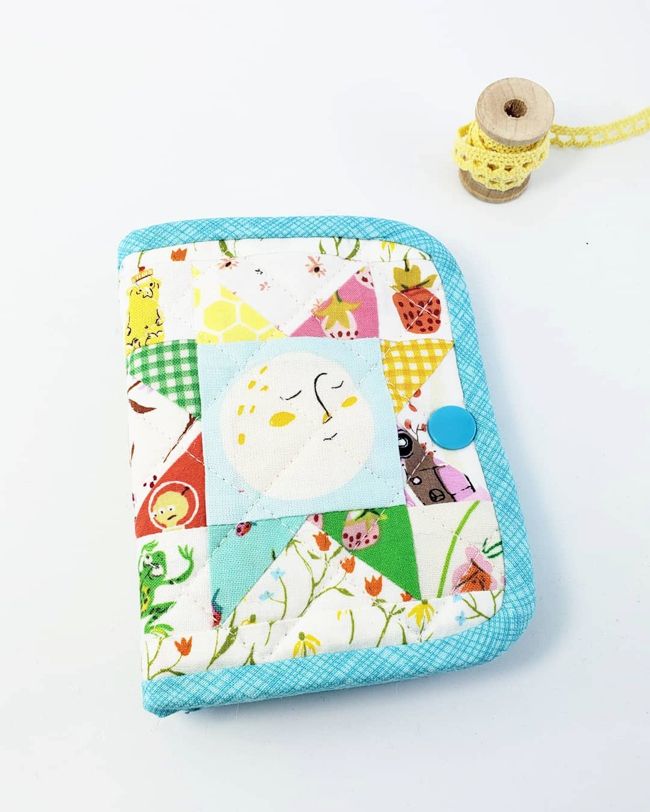
How sweet is this adorable starry pouch? I love the darling details and that touch of linen on the back! Lindsay's makes are always so whimsical!
Stephanie @sissybellesews and Zoe @zoemayson chose the winners and awarded prizes for Week 2. Thanks so much, my friends!
Week 2 Winners (photo credits to Sally and Brigitte)
Sally @sally_rosson

I love this sweet pair of needle books that Sally stitched up--the cute fabrics she chose look so great together! Gorgeous work, Sally!
Brigitte @brigitteschoelinck
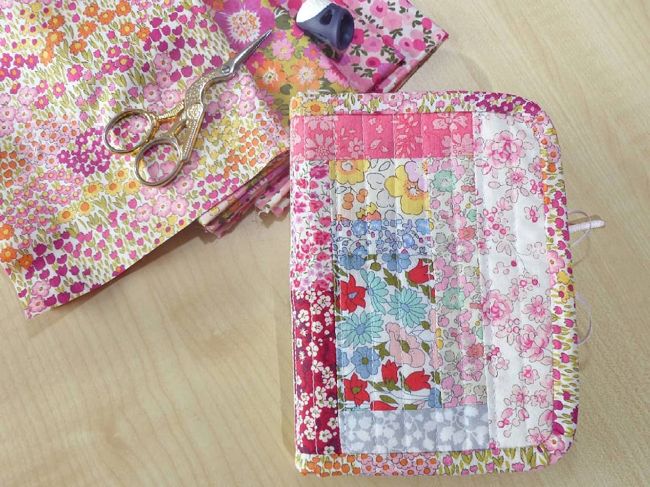
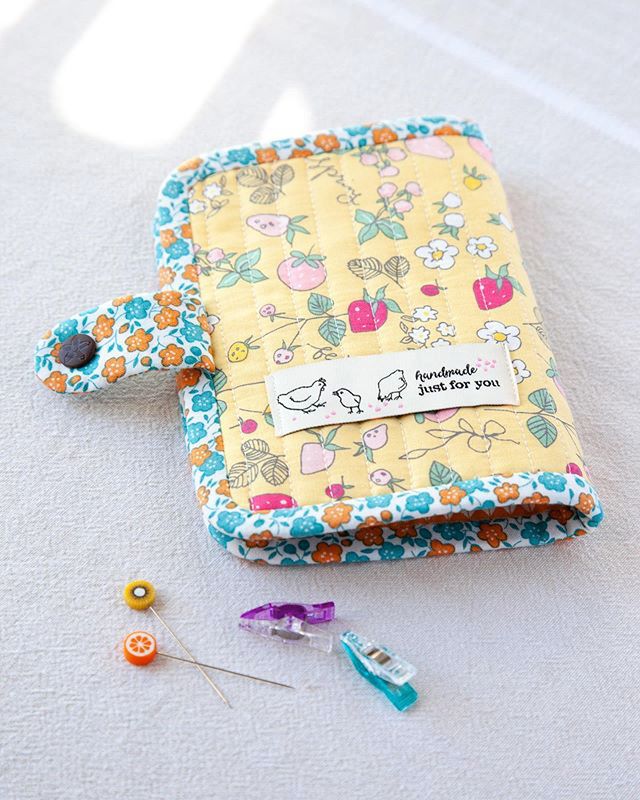
This cheery floral needle book that Brigitte made in floral prints is so lovely, what a great use for precious Liberty scraps!
There have been so many amazing needle books so far and more to come! I can't wait to see them! Thanks to all who are participating and to those following along, too!
Happy Stitching,
Kim
Read on to see what I’ve been sewing and to see our SAL winners for weeks 1 and 2!
I used 3/4" sided hexagons for this EPP needle book, and with 22 hexagons, it was just right for a weekend project!
The front slip pocket fits a little notebook so I can keep notes when designing patterns. I'm constantly losing little slips of paper with my scrawled out measurements, so this should *fingers crossed* help keep me organized! I added a hexagon and ribbon to one of the felt pages and I love those sweet ladybugs on the zipper pocket!
I also posted this video, which shows how to measure and join bias binding to perfectly fit your needle book (or any small project!):
And now for the winners of Weeks 1 and 2...
Elnora @elnorac and Lori @lorimillerdesigns chose the winners and also provided fabulous prizes for Week 1!
Week 1 Winners (photo credits to Lindsay and Stef)
Stef @stef_andthefabricpieces
This amazing Liberty needle book is delightful—from the circle appliques to the French knots, I love every little thing about it. Stef's work is impeccable!
Lindsay @linzentart
How sweet is this adorable starry pouch? I love the darling details and that touch of linen on the back! Lindsay's makes are always so whimsical!
Stephanie @sissybellesews and Zoe @zoemayson chose the winners and awarded prizes for Week 2. Thanks so much, my friends!
Week 2 Winners (photo credits to Sally and Brigitte)
Sally @sally_rosson
I love this sweet pair of needle books that Sally stitched up--the cute fabrics she chose look so great together! Gorgeous work, Sally!
Brigitte @brigitteschoelinck
This cheery floral needle book that Brigitte made in floral prints is so lovely, what a great use for precious Liberty scraps!
There have been so many amazing needle books so far and more to come! I can't wait to see them! Thanks to all who are participating and to those following along, too!
Happy Stitching,
Kim
Pins and Needles SAL: My favorite sewing tools and notions
6.24.2019
As we gear up for the Pins and Needles sew along, I wanted to share some of my favorite tools and notions with you. I use these tools for many of my small patchwork and quilted projects—they are helpful to have on hand for lots of stitching situations! This is not a sponsored post; I purchased each of these items for my own use. Links below marked with an asterisk are affiliate links.
Sewing Tools
My favorite things for sewing bias binding:
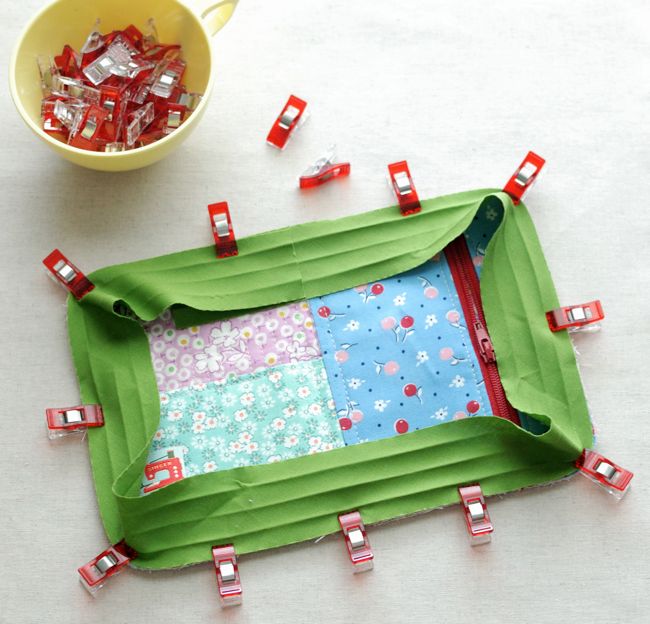
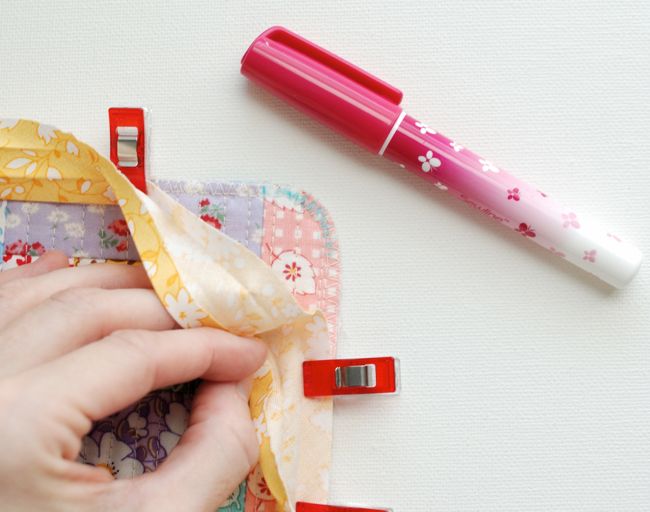
*Clover Wonder Clips - I rarely need to use straight pins because of these little clips. They are fantastic for binding, zippers, thick fabrics, and for preventing pin holes. I keep them ready to use by storing them in a cute vintage teacup!
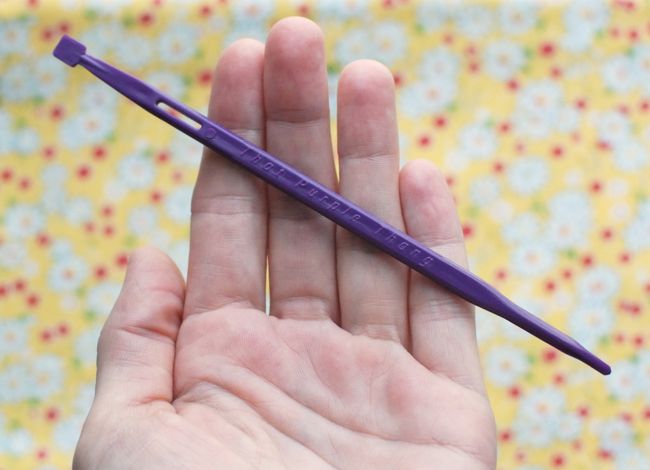
*That Purple Thang – I love this little tool! It’s super handy for adjusting fabric under your presser foot (and keeping your fingers out of harm’s way) and as a point turner or stuffing tool. The square end is 1/4” wide and there is a 1/2” slot which is great for putting elastic or ribbon through casings. I use it especially for sewing the binding around curved edges.
*Sewline Glue Pen - This water-soluble glue is perfect for English paper piecing and also for getting a really clean finish on zippers and binding. After adhering fabric with the glue, press with an iron until dry and it stays put until you pull it apart. This glue pen is refillable and cute to boot!
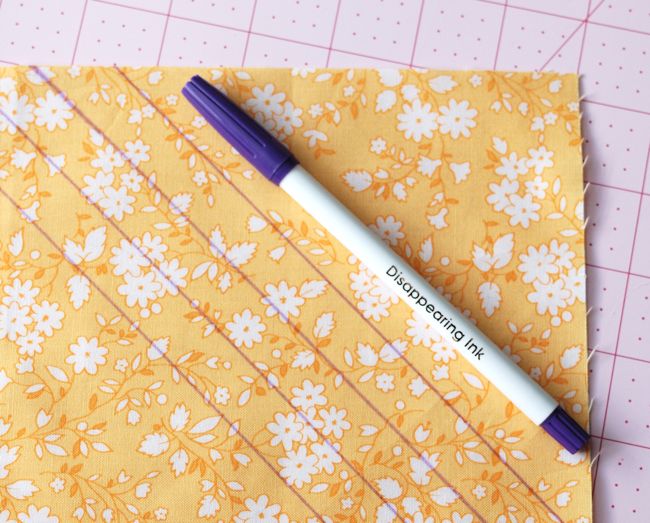
*Disappearing Fabric Pen - I’ve tried several brands of marking pens but this one is my favorite. The tip is soft enough that it doesn’t dent the fabric, but you can still get a pretty thin line with it. The ink typically disappears between a couple of hours to a few days, or you can speed it up with water. But if it disappears too fast—just press the fabric with a hot iron and the marks reappear like magic! Store these pens with the tip down to help keep them from drying out.
Notions
Two of my most frequently asked questions are about zippers and tags, so I’m going to let you know what you need and where to find them!
Zippers
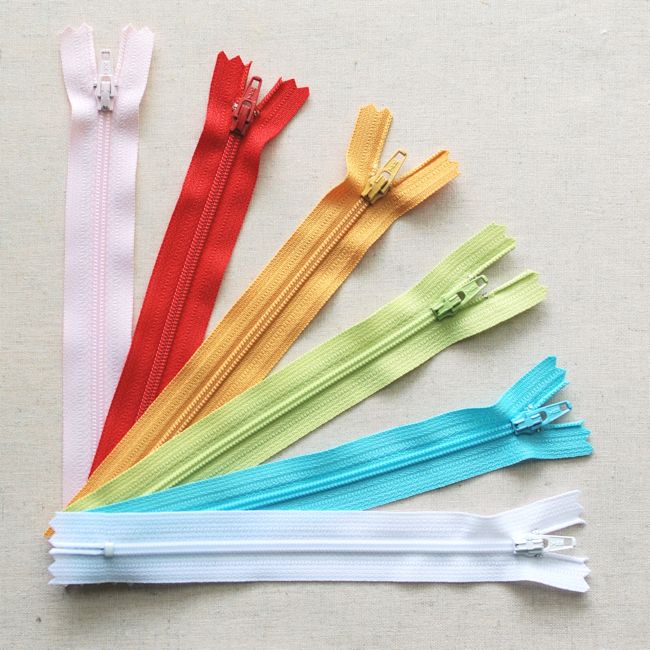
For the Pins and Needles Book project I recommend nylon zippers because we’ll need to cut them to size. YKK brand is terrific; they are reliably smooth and come in a ton of great colors.
If you do need to buy zippers, my favorite online source is Zipit on Etsy. For the medium needle book you’ll want a 6” zipper, and for the small needle book a 5” zipper, but you can cut nylon zippers down from any size so feel free to use whatever you have on hand! Zipit also has a great selection of metal zippers, which are great for my Quilted Notions Pouch pattern.
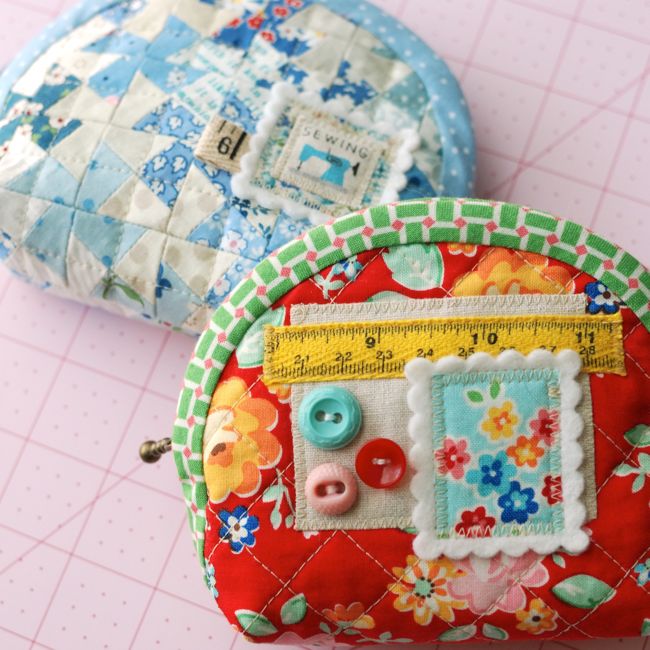
Tags
One of my favorite kind of embellishments is to tuck a little folded ribbon underneath binding. I love making tags with cotton ribbon, twill, jacquard, or my own custom labels!
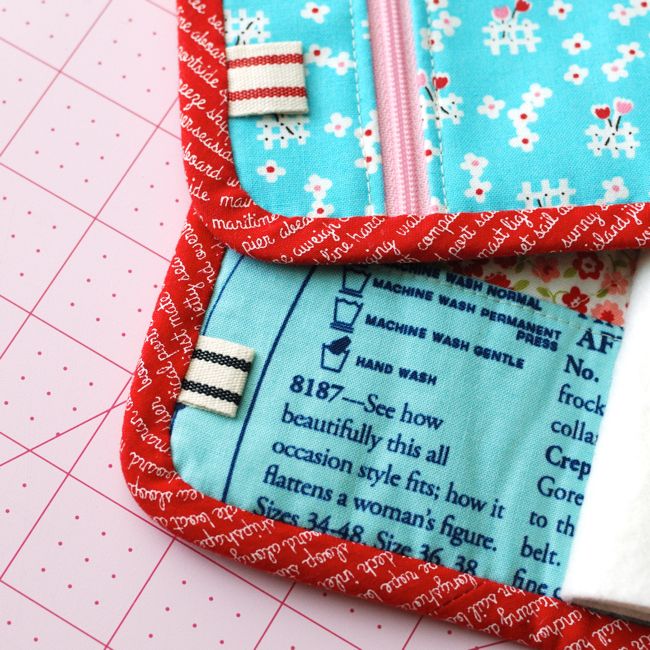
Try searching for French twill ribbon on Etsy for this pretty double striped cotton ribbon.
I also love these cute cotton twill measuring tape ribbons. Both versions are made by Creative Impressions, and you can also find them by the yard or roll on Etsy.
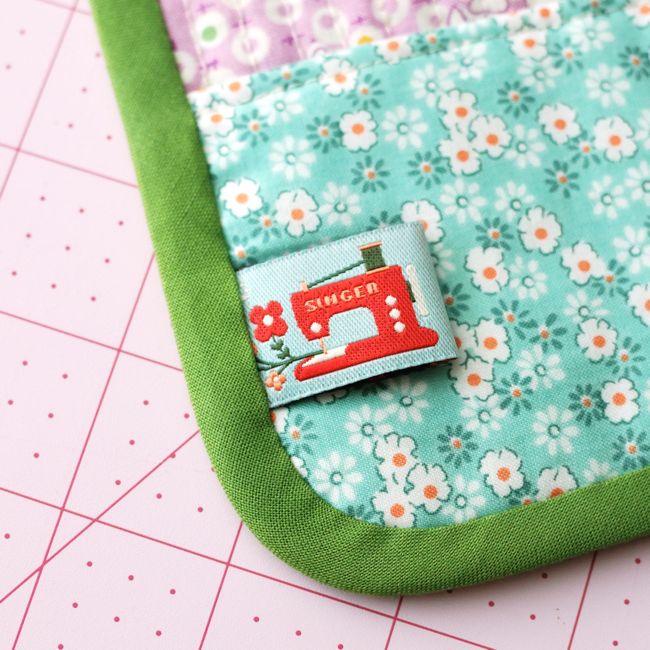
Jacquard ribbon is a wonderful option for super colorful, detailed tags. Some of my favorites are from Renaissance Ribbons.
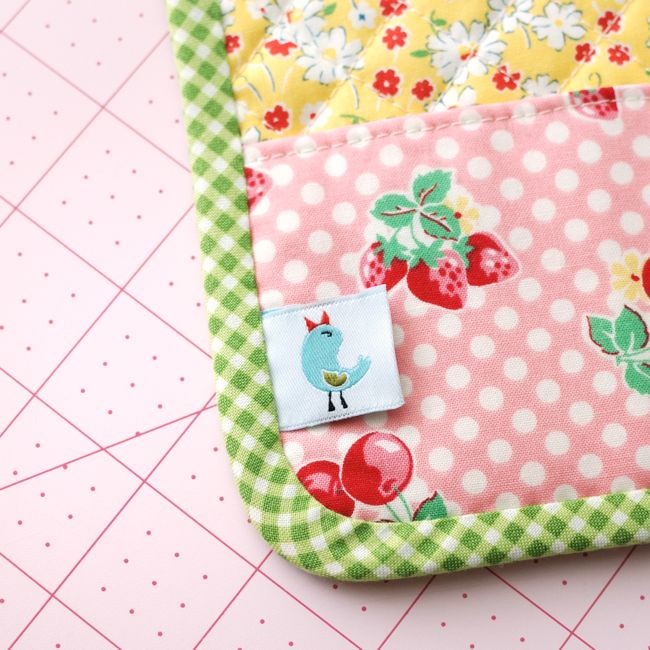
My own logo tags were made by ClothingLabels4U. I found this company very easy to work with, the quality is great, and they have low minimum orders!
I hope you found these ideas helpful! If there is anything else you're searching for, let me know in the comments and I'll try to help out!
Happy Stitching,
Kim
Sewing Tools
My favorite things for sewing bias binding:
*Clover Wonder Clips - I rarely need to use straight pins because of these little clips. They are fantastic for binding, zippers, thick fabrics, and for preventing pin holes. I keep them ready to use by storing them in a cute vintage teacup!
*That Purple Thang – I love this little tool! It’s super handy for adjusting fabric under your presser foot (and keeping your fingers out of harm’s way) and as a point turner or stuffing tool. The square end is 1/4” wide and there is a 1/2” slot which is great for putting elastic or ribbon through casings. I use it especially for sewing the binding around curved edges.
*Sewline Glue Pen - This water-soluble glue is perfect for English paper piecing and also for getting a really clean finish on zippers and binding. After adhering fabric with the glue, press with an iron until dry and it stays put until you pull it apart. This glue pen is refillable and cute to boot!
*Disappearing Fabric Pen - I’ve tried several brands of marking pens but this one is my favorite. The tip is soft enough that it doesn’t dent the fabric, but you can still get a pretty thin line with it. The ink typically disappears between a couple of hours to a few days, or you can speed it up with water. But if it disappears too fast—just press the fabric with a hot iron and the marks reappear like magic! Store these pens with the tip down to help keep them from drying out.
Notions
Two of my most frequently asked questions are about zippers and tags, so I’m going to let you know what you need and where to find them!
Zippers
For the Pins and Needles Book project I recommend nylon zippers because we’ll need to cut them to size. YKK brand is terrific; they are reliably smooth and come in a ton of great colors.
If you do need to buy zippers, my favorite online source is Zipit on Etsy. For the medium needle book you’ll want a 6” zipper, and for the small needle book a 5” zipper, but you can cut nylon zippers down from any size so feel free to use whatever you have on hand! Zipit also has a great selection of metal zippers, which are great for my Quilted Notions Pouch pattern.
Tags
One of my favorite kind of embellishments is to tuck a little folded ribbon underneath binding. I love making tags with cotton ribbon, twill, jacquard, or my own custom labels!
Try searching for French twill ribbon on Etsy for this pretty double striped cotton ribbon.
I also love these cute cotton twill measuring tape ribbons. Both versions are made by Creative Impressions, and you can also find them by the yard or roll on Etsy.
Jacquard ribbon is a wonderful option for super colorful, detailed tags. Some of my favorites are from Renaissance Ribbons.
My own logo tags were made by ClothingLabels4U. I found this company very easy to work with, the quality is great, and they have low minimum orders!
I hope you found these ideas helpful! If there is anything else you're searching for, let me know in the comments and I'll try to help out!
Happy Stitching,
Kim
Pins and Needles Sew Along
6.18.2019
Hi friends! Thank you so much for your incredible response to my new needle book sewing pattern, I'm thrilled that so many of you want to stitch it up! The pattern has lots of different options and new skills to practice, so I thought it would be helpful—and fun—to have a sew along! The SAL will run from July 8 through August 4. There will be weekly prizes, and at the end I'll have a wrap-up and announce a grand prize.
First, you'll want to grab a copy of the Pins and Needles Book sewing pattern, which is 20% off from now through the end of the sew along!
In addition to regular quilting supplies, you'll also need a nylon zipper (or two) and closure hardware, which are some of the goodies that I'll cover in a post very soon!
I've got some fantastic makers lined up to host each week with their own needle books and prizes:
Week 1 – July 8-14
Elnora @elnorac
Lori @lorimillerdesigns
Week 2 – July 15-21
Stephanie @sissybellesews
Zoe @zoemayson
Week 3 – July 22-28
Helen @henhousehandmade
Laurraine @patchworkpottery
Week 4 – July 29-August 4
Sarah @princess_ina_pouch
Mary @sunnydaysupply
A few gorgeous Pins and Needles Books stitched up by friends...


Joining the sew along is simple! Here's what you need to do:
1) Follow me @retro_mama on Instagram, as well as each of the amazing ladies listed above. Then follow the hashtag #pinsandneedlesSAL to see all the projects, WIPs, and giveaways!
2) Post your photos on Instagram with the hashtags #pinsandneedlesSAL and #retromamapattern to participate and be eligible for prizes. You are very welcome to post WIPs but only completed projects will be eligible to win. Be sure that your account is public during the SAL so we can see your projects! You may enter more than once if you make more than one Pins and Needles Book.
I'll be blogging each week with tips, inspiration, and more info about the giveaways. I can't wait to see the beautiful needle books that you’ll be stitching up!
So grab the pattern, prepare to dive into your scrap bin, and the SAL will be here before you know it!
Happy Stitching,
Kim
First, you'll want to grab a copy of the Pins and Needles Book sewing pattern, which is 20% off from now through the end of the sew along!
In addition to regular quilting supplies, you'll also need a nylon zipper (or two) and closure hardware, which are some of the goodies that I'll cover in a post very soon!
I've got some fantastic makers lined up to host each week with their own needle books and prizes:
Week 1 – July 8-14
Elnora @elnorac
Lori @lorimillerdesigns
Week 2 – July 15-21
Stephanie @sissybellesews
Zoe @zoemayson
Week 3 – July 22-28
Helen @henhousehandmade
Laurraine @patchworkpottery
Week 4 – July 29-August 4
Sarah @princess_ina_pouch
Mary @sunnydaysupply
A few gorgeous Pins and Needles Books stitched up by friends...
needle book and photo by Minki @zeriano
needle book and photo by Minki @zeriano
needle book and photo by Minki @zeriano
needle book and photo by Deidra @quiltyobsession
needle book and photo by Deidra @quiltyobsession
needle book and photo by Deidra @quiltyobsession
needle book and photo by Deidra @quiltyobsession
needle book and photo by Polina @polina.lisitsyna
needle book and photo by Polina @polina.lisitsyna
Joining the sew along is simple! Here's what you need to do:
1) Follow me @retro_mama on Instagram, as well as each of the amazing ladies listed above. Then follow the hashtag #pinsandneedlesSAL to see all the projects, WIPs, and giveaways!
2) Post your photos on Instagram with the hashtags #pinsandneedlesSAL and #retromamapattern to participate and be eligible for prizes. You are very welcome to post WIPs but only completed projects will be eligible to win. Be sure that your account is public during the SAL so we can see your projects! You may enter more than once if you make more than one Pins and Needles Book.
I'll be blogging each week with tips, inspiration, and more info about the giveaways. I can't wait to see the beautiful needle books that you’ll be stitching up!
So grab the pattern, prepare to dive into your scrap bin, and the SAL will be here before you know it!
Happy Stitching,
Kim
Pins and Needles Book Pattern and SALE!
6.06.2019
Hello friends! My needle book sewing pattern is finally here and you can find it in my shop. And to kick it off, the pattern is 20% off through the end of the Pins and Needles Sew Along!

The Pins and Needles Book pattern is in PDF format only and recommended for intermediate stitchers. Experience with bias binding and zippers is helpful. My detailed written instructions and 50+ photos will guide you every step of the way!
Included in the pattern are instructions for 3 pocket combinations and 3 types of closures, as well as 2 covers, so there's a lot of opportunity for personalization!
Finished Sizes:
Small needle book 3-1/2" x 5"
Medium needle book 4-1/2" x 6"
Cover Options:
Log Cabin
Linen Stripe
(or use your own block!)
Pocket Options:
2 Slip Pockets
2 Zipper Pockets
Slip Pocket + Zipper Pocket combo
Closure Options:
Flap with snap
Button and Loop
Fabric Ties
I can't wait to see your projects! Be sure to share your finished needle books on Instagram with the hashtags #pinsandneedlesbook and #retromamapattern
Happy Stitching,
Kim
Herringbone Pincushion Tutorial
4.23.2019
Hello Stitchers! I have a scrappy secret, but I think it's one that a lot of us share—a lot of times when I need a little snippet of fabric, when I *should* reach for my scrap basket—I pull a brand new piece of fabric off the shelf instead. Shhhh—I won't tell!

However, I am trying to break that habit, and hope that I might help inspire you to do the same! I challenged myself to make something using ONLY scraps from previous projects, and I came up with these super scrappy pinnies! I've written up a tutorial so you can make some, too! Let's get stitching!

Herringbone Pincushion Tutorial
Materials
(2) Muslin, cotton voile, or solid quilting cotton rectangles for foundation piecing 2-1/2" x 7-1/2"
(1) Backing fabric (linen or quilting cotton) 4-1/2" x 7-1/2"
Lots of quilting cotton scraps 1/2" to 3/4" wide x 4-1/2" long
(4) Quilting cotton scraps 1-1/2" to 2" wide x 4" long for ends
(2) 100% Cotton quilt batting 5-1/2" x 8-1/2"
Machine piecing and quilting thread or other 100% cotton thread
Crushed walnut shells (affiliate link) or other weighted pincushion fill
Hand quilting thread to finish the pincushion
Tools
Sewing machine, cutting mat, rotary cutter, quilting ruler, erasable fabric pen, iron and ironing board, chopstick or other tool for turning corners, hand sewing needle, small funnel, spoon
Terms
Right side: the side of the fabric with the design printed on it
RST: Right sides together
Instructions
1. Place the foundation piecing rectangles side by side as shown. Using a quilting ruler and pencil or erasable fabric pen, draw a 30 degree line on the left-hand piece, and a 30 degree line going the opposite direction on the right-hand piece, somewhere around the middle. The lines do not need to line up since we’re keeping this scrappy!

2. Place a quilting cotton strip along one of the lines, right side up. Place another quilting cotton strip RST on top of the first strip, matching the long sides along the line. The ends should overhang the sides of the foundation rectangle. Sew the strips together with a 1/8” seam allowance. Press the top strip open. If your machine doesn’t like sewing such a narrow seam allowance, then use one that is slightly wider—we don’t want those pieces pulling apart!


3. Continue adding strips in this way until you have covered the end of the foundation material, then sew strips to the other side of your first strip to finish it. Use wide strips for the last corners of the patchwork, mine are about 2”—remember that you will lose a bit of fabric in the seam allowances so it’s okay if they’re a bit wider than the other strips.


A few tips:
* It helps to do a few stitches beyond the sides of the foundation material, you’ll get a cleaner fold when you press the strips open. Backstitch right on the edges of the foundation rectangle.
* I did not repeat very many fabrics because I didn’t want to accidentally have the same fabrics next to each other!
* I mixed up the widths between 1/2" and 3/4” for an extra scrappy look.
4. Turn over the patchwork panels and trim to the original 2-1/2” x 7-1/2” size.


5. Place the two patchwork panels RST and sew them together along one long edge with a 1/4" seam allowance, backstitching on both ends of the seam. Open up the panel and press the seam allowance open.
6. Place the patchwork panel on a piece of batting and press*. Secure with a couple of pins if necessary. With your quilting ruler and erasable fabric pen, draw quilt lines following the herringbone pattern, spaced 1/2” apart or as desired. Quilt the panel. I used a walking foot and a stitch length of 3.0, with cream colored thread.

7. Place your linen or print backing fabric on a piece of batting and secure with pins if necessary*. Quilt as desired. Trim and square the quilted pieces, making sure they are the same size.
* I do not use backing fabric underneath the quilt batting—omitting it helps reduce the bulkiness of the seam allowances.
8. Place the top and bottom pincushion pieces RST, secure with pins, and sew around the outer edge with a 1/4" seam allowance, leaving a 2” space on one long side for turning and stuffing.

9. Trim the corners and turn right side out. Press with an iron, making sure the unsewn edges are turned under neatly.

10. Fill the pincushion with crushed walnut shells or other weighted fill. I used a homemade cardstock funnel and a spoon. Leave just a little bit of space for the fill to move around. Sew the hole closed with little ladder stitches (you can see a photo of this in Step 3 of the Finish section of my house ornament tutorial).
If you make these pincushions, be sure to tag me @retro_mama and use the hashtags #herringbonepincushion #retromamapattern and #stitchupyourscraps on Instagram!


And a little scrap storage tip: I have tried a few different ways of storing my scraps but my current favorite method is to keep scraps of all the same color, regardless of size, in a zip closure plastic bag. It makes finding the perfect prints for these monochromatic projects so easy! I keep all of the bags on a little cart that I bought at the craft store. What's your favorite way to store scraps?

Happy Stitching!
Kim
However, I am trying to break that habit, and hope that I might help inspire you to do the same! I challenged myself to make something using ONLY scraps from previous projects, and I came up with these super scrappy pinnies! I've written up a tutorial so you can make some, too! Let's get stitching!
Herringbone Pincushion Tutorial
Materials
(2) Muslin, cotton voile, or solid quilting cotton rectangles for foundation piecing 2-1/2" x 7-1/2"
(1) Backing fabric (linen or quilting cotton) 4-1/2" x 7-1/2"
Lots of quilting cotton scraps 1/2" to 3/4" wide x 4-1/2" long
(4) Quilting cotton scraps 1-1/2" to 2" wide x 4" long for ends
(2) 100% Cotton quilt batting 5-1/2" x 8-1/2"
Machine piecing and quilting thread or other 100% cotton thread
Crushed walnut shells (affiliate link) or other weighted pincushion fill
Hand quilting thread to finish the pincushion
Tools
Sewing machine, cutting mat, rotary cutter, quilting ruler, erasable fabric pen, iron and ironing board, chopstick or other tool for turning corners, hand sewing needle, small funnel, spoon
Terms
Right side: the side of the fabric with the design printed on it
RST: Right sides together
Instructions
1. Place the foundation piecing rectangles side by side as shown. Using a quilting ruler and pencil or erasable fabric pen, draw a 30 degree line on the left-hand piece, and a 30 degree line going the opposite direction on the right-hand piece, somewhere around the middle. The lines do not need to line up since we’re keeping this scrappy!
2. Place a quilting cotton strip along one of the lines, right side up. Place another quilting cotton strip RST on top of the first strip, matching the long sides along the line. The ends should overhang the sides of the foundation rectangle. Sew the strips together with a 1/8” seam allowance. Press the top strip open. If your machine doesn’t like sewing such a narrow seam allowance, then use one that is slightly wider—we don’t want those pieces pulling apart!
3. Continue adding strips in this way until you have covered the end of the foundation material, then sew strips to the other side of your first strip to finish it. Use wide strips for the last corners of the patchwork, mine are about 2”—remember that you will lose a bit of fabric in the seam allowances so it’s okay if they’re a bit wider than the other strips.
A few tips:
* It helps to do a few stitches beyond the sides of the foundation material, you’ll get a cleaner fold when you press the strips open. Backstitch right on the edges of the foundation rectangle.
* I did not repeat very many fabrics because I didn’t want to accidentally have the same fabrics next to each other!
* I mixed up the widths between 1/2" and 3/4” for an extra scrappy look.
4. Turn over the patchwork panels and trim to the original 2-1/2” x 7-1/2” size.
5. Place the two patchwork panels RST and sew them together along one long edge with a 1/4" seam allowance, backstitching on both ends of the seam. Open up the panel and press the seam allowance open.
6. Place the patchwork panel on a piece of batting and press*. Secure with a couple of pins if necessary. With your quilting ruler and erasable fabric pen, draw quilt lines following the herringbone pattern, spaced 1/2” apart or as desired. Quilt the panel. I used a walking foot and a stitch length of 3.0, with cream colored thread.
7. Place your linen or print backing fabric on a piece of batting and secure with pins if necessary*. Quilt as desired. Trim and square the quilted pieces, making sure they are the same size.
* I do not use backing fabric underneath the quilt batting—omitting it helps reduce the bulkiness of the seam allowances.
8. Place the top and bottom pincushion pieces RST, secure with pins, and sew around the outer edge with a 1/4" seam allowance, leaving a 2” space on one long side for turning and stuffing.
9. Trim the corners and turn right side out. Press with an iron, making sure the unsewn edges are turned under neatly.
10. Fill the pincushion with crushed walnut shells or other weighted fill. I used a homemade cardstock funnel and a spoon. Leave just a little bit of space for the fill to move around. Sew the hole closed with little ladder stitches (you can see a photo of this in Step 3 of the Finish section of my house ornament tutorial).
If you make these pincushions, be sure to tag me @retro_mama and use the hashtags #herringbonepincushion #retromamapattern and #stitchupyourscraps on Instagram!
And a little scrap storage tip: I have tried a few different ways of storing my scraps but my current favorite method is to keep scraps of all the same color, regardless of size, in a zip closure plastic bag. It makes finding the perfect prints for these monochromatic projects so easy! I keep all of the bags on a little cart that I bought at the craft store. What's your favorite way to store scraps?
Happy Stitching!
Kim


